Thursday, December 31, 2009

Mash Potatoes with mixed vegetables

On thanksgiving dinner, I'm supposed to prepare mash potatoe with vegetables. Initially, it made me worry since I've never really tried making this dish from scratch, what more with vegetables. After sourcing around for recipes, I kinda combined 3 into 1 :)


Potatoe- 2 pounds butter-1 stick milk-1/2 cup mushroom- 1 pound salt & pepper cheese- ½ cup cauliflower- 1 oil- 4tbsp

1) Remove blemishes and scrub potatoes. Slice the potatoes into quarters and place in a large sauce pan. Add water to pan until potatoes are covered. Bring to a boil.

2) Reduce heat, cover and continue cooking 20 minutes, or until potatoes are tender. Remove from heat, drain and peel off skins.

3) Place potatoes in a large bowl. Add butter and cheese and beat with an electric mixer. Gradually add the milk, continuing to beat potatoes until they reach desired consistency. Add more milk, if needed and salt and pepper to taste.

Blending the potatoe, cheese, milk and butter

Gobbly wobbly

4) Preheat oven to 200deg c. Spread cauliflower pieces on baking sheet. Sprinkle with about 1/4 cup olive oil. Sprinkle with rosemary, salt and pepper.

5) Bake in oven 20 minutes, stirring occasionally, until lightly browned and tender.

6) Melt 4 tablespoons of butter in a large skillet over medium heat.

7) Add mushroom and sauté until soft, stirring.

8) Stir mushrooms into potatoes.

9) Place in serving bowl and sprinkle with fresh Parmesan cheese.

End results (I know, my skills are not very good)

I suggest going light on the cheese because mine was commented to be too cheesy and hard to down.


credits to recipe tips with mushrooms, bacon bits, and cauliflower


Thursday, December 17, 2009

Gingerbread Cookies


How better to soak into the festive seasons than to do something which you enjoy? For me, baking is something therapeutic and something i enjoyed.


Gingerbread Men:

3 cups (390 grams) all purpose flour

1/4 teaspoons salt

3/4 teaspoon baking soda

2 teaspoons ground ginger

1 teaspoon ground cinnamon

1/4 teaspoon ground nutmeg

1/4 teaspoon ground cloves

1/2 cup (113 grams) unsalted butter

1/2 cup (100 grams) granulated white sugar

1 large egg

2/3 cup (160 ml) unsulphured molasses

Note: To prevent the molasses from sticking to the measuring cup, first spray the cup with a non stick vegetable spray

Confectioners Frosting:

2 cups (230 grams) confectioners sugar (icing or powdered sugar), sifted

1/2 cup (113 grams) unsalted butter

1 teaspoon pure vanilla extract

1 1/2 tablespoons milk or light cream

Assorted food colors (if desired)

Gingerbread Men: In a large bowl, sift or whisk together the flour, salt, baking soda, and spices. Set aside.

your ingredients

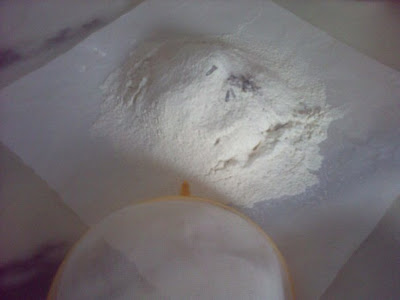
sift the flour and baking soda together

the dry stuff

In the bowl of electric mixer, with the paddle attachment, cream the butter and sugar until light and fluffy. Add the egg and molasses and beat until well combined. Gradually add the flour mixture beating until incorporated.


your black molasses

Divide the dough in half, and wrap each half in plastic wrap and refrigerate for at least two hours or overnight.

Preheat oven to 350 degrees F (177 degrees C) and place rack in center of oven. Line 2 baking sheets with parchment paper and set aside while you roll out the dough.

On a lightly floured surface, roll out the dough to a thickness of about 1/4 inch. Use a gingerbread cutter to cut out the cookies. With an offset spatula lift the cut out cookies onto the baking sheet, placing the cookies about 1 inch (2.54 cm) apart. If you are hanging the cookies or using as gift tags, make a hole at the top of the cookies with a straw or end of a wooden skewer. (I actually didnt have the gingerbread cutter so i just used normal cookie cutters)

Bake for about 8 - 12 minutes depending on the size of the cookies. Small ones will take about 8 minutes, larger cookies will take about 12 minutes. They are done when they are firm and the edges are just beginning to brown.

Remove the cookies from the oven and cool on the baking sheet for about 1 minutes. When they are firm enough to move, transfer to a wire rack to cool completely.

If desired, you can press raisins, currants, or candies into the dough for eyes and buttons while the cookies are still warm. Otherwise, confectioners frosting can be used to decorate the cookies. You can also use the icing as a glue to attach candies, raisins, and sprinkles.

Confectioners Frosting: In an electric mixer (or with a hand mixer), cream the butter until smooth and well blended. Add the vanilla extract. With the mixer on low speed, gradually beat in the sugar. Scrape down the sides of the bowl and beater. Add the milk and beat on high speed until frosting is light and fluffy (about 3-4 minutes). Add a little more milk if too dry. Place the frosting in a pastry bag fitted with a decorative tip and decorate the gingerbread men as desired.

Tint portions of frosting with desired food color (I use the paste food coloring that is available at cake decorating stores and party stores).

Makes about 3 dozen cookies depending on the size of cookie cutter used.

Store in an airtight container.

for more, visit joy of baking

Friday, December 11, 2009

French Apple Tart

Today, we were on a mission to bake this! It was definitely by no means an easy task even with 2 people working alongside. We took almost 4.5 hrs just to bake this but i guess it was a worthy effort. Well , the ingredients were really cheap since the bulk of the tart are apples but i wouldn't recommend unless you are looking for some challenge and to be standing around in the kitchen for the whole noon.


For the Crust:
1 1/2 cups (210 grams) all purpose flour
1/4 cup (50 grams) granulated white sugar
1/8 teaspoon salt
1/2 cup (113 grams) unsalted butter
1 large egg, lightly beaten

For the Glaze:
1/2 cup apricot preserves
1 tablespoon Cognac, Calvados, Rum or Water

For the Apricot Glaze:
In a small saucepan heat the apricot preserves until boiling. Remove from heat and strain to get rid of lumps. Add the Cognac or water.

For the crust:
Sift flour and salt together and set aside. Place the butter in your mixer and beat until softened. Add sugar and beat until light and fluffy. Gradually add the beaten egg, beating just until incorporated. Don't overmix or butter will separate and lighten in color. Add the flour mixture all at once and mix just until it forms a ball. Don't overwork or pastry will be hard when baked.

Flatten dough into disk, cover with plastic wrap, and refrigerate for 20 minutes or until firm.

On a lightly floured surface, roll out the sweet pastry to the desired size. To prevent the pastry from sticking to the counter and to ensure uniform thickness, keep lifting up and turning the pastry a quarter turn as you roll (always roll from the center of the pastry outwards to get uniform thickness). Roll to a round about 1/4-inch (5 mm) thick size that fits a 8 or 9-inch (20 - 23 cm) tart pan. To make sure it is the right size, take your tart pan, flip it over, and place it on the rolled out pastry. The pastry should be about an inch larger than pan.

When the pastry is rolled to the desired size, lightly roll pastry around your rolling pin, dusting off any excess flour as you roll. Unroll onto top of tart pan. Never pull the pastry or you will get shrinkage (shrinkage is caused by too much pulling of the pastry when placing it in the pan). Gently lay in pan and with a small floured piece of pastry, lightly press pastry into bottom and up sides of pan. Roll your rolling pin over top of pan to get rid of excess pastry. With a thumb up movement, again press dough into pan. Roll rolling pin over top again to get rid of any extra pastry. Prick bottom of dough (this will prevent the dough from puffing up as it bakes). Cover and refrigerate for 20 minutes to chill the butter and to rest the gluten.

Preheat oven to 400 degrees F (205 degrees C) and place rack in center of oven. Line unbaked pastry shell with parchment paper or aluminum foil. Fill tart pan with pie weights or beans, making sure the weights are to the top of the pan and evenly distributed over the entire surface. Bake crust for 20 to 25 minutes until crust is dry and lightly golden brown. Remove weights and cool crust on wire rack before filling. When cool, spread a thin layer of warm apricot glaze over the bottom and sides of the tart to seal the crust and prevent it from getting soggy. Let the glaze dry between 20 - 30 minutes.


For the Apple Filling:
6 medium-sized apples (2 pounds) (900 grams)
3 tablespoons (40 grams) unsalted butter
, divided
1/4 - 1/2 cup (50 - 100 grams) granulated white sugar
, divided
1/2 teaspoon freshly grated lemon
zest
1/2 teaspoon cinnamon, divided
Confectioners' Sugar for browning the top of the tart.

For Apple Tart: For bottom layer of apples: Peel, core, and slice three of the apples. In a large skillet melt 1 tablespoon (13 grams) unsalted butter and stir in between 2 - 4 tablespoons (25 - 50 grams) of the sugar, the lemon zest, and 1/4 teaspoon cinnamon. Add the apples and saute over moderate heat, stirring occasionally for 7 to 10 minutes, or until the apples are soft. Gently mash the apples with the back of a spatula or spoon and stir the mixture until most of the liquid has evaporated. Remove from heat and let cool.

For top layer of apples: Peel, core, and cut the apples into slices 1/4 inch (1/2 cm) thick. Melt 1 tablespoon (13 grams) butter in a large skillet over medium heat and stir in the other 2 - 4 tablespoons (25 - 50 grams) sugar and 1/4 teaspoon cinnamon. Add the apples and saute until they begin to soften, approximately 5 minutes. Set the cooked apples aside.

Spoon the applesauce mixture into the cooled and glazed pre-baked tart shell. Arrange the apple slices in concentric circles over the applesauce, and brush with 1 - 2 tablespoons (13-26 grams) melted butter. Bake the tart on a baking sheet in a preheated 350 degree F (177 degree C) oven for 25-30 minutes or until the apples are nicely browned and soft. Remove from oven and sprinkle the tart with confectioners' sugar, cover the edges of tart with foil, and broil it under a preheated broiler about 4 inches from the heat until the edges of the apples are golden brown and crisp. Once the tart has cooled lightly glaze the apple slices with warm apricot glaze.

Use apricot glaze to seal the baked tart shell and to brush the top of the finished tart.

Serve the tart warm or at room temperature with softly whipped cream or vanilla ice cream.

Makes 1 - 8 or 9 inch (20 or 23 cm) tart.

for more, visit joy of baking

Wednesday, December 2, 2009

Chocolate Cheesecake

Whoever said 3 girls and boredom come out with nothing good hasnt known the invention of good recipes.


Chocolate Cheesecake

Crust:
1 1/2 cups (150 grams) chocolate wafer crumbs (or digestive biscuits. sherri happens to be insane about them so we used 400g of digestives. haha.)
1/3 cup (75 grams) unsalted butter, melted (proportion the butter according to your crumbs)

Filling:
12 ounces (340 grams) semi-sweet or bittersweet chocolate, chopped
24 ounces (680 grams) (3 - 8 ounces packages) full fat cream cheese, room temperature
1 cup (200 grams) granulated white sugar
3 large eggs, room temperature
1 1/2 teaspoons pure vanilla extract
1 cup (240 ml) full fat or light sour cream, room temperature

Ganache:
4 ounces (115 grams) semi-sweet or bittersweet chocolate, chopped
1/3 cup (80 ml) heavy whipping cream
1 teaspoon unsalted butter, room temperature

Chocolate Cheesecake: Butter or spray with a non stick vegetable spray, a 10 inch (25 cm) spring form pan. Place the spring form pan on a larger baking pan to catch any leakage while the cheesecake is baking. Preheat oven to 350 degrees F (180 degrees C) with rack in center of oven.

Crust: In a medium sized bowl combine the chocolate wafer crumbs and melted butter. Press the crumbs evenly over the bottom of the spring form pan. Cover and refrigerate while you make the filling.

For Filling:Melt the chopped chocolate in a stainless steel bowl placed over a saucepan of simmering water, stirring until smooth. Remove from heat and set aside to cool.

Meanwhile, in the bowl of your electric mixer (or with a hand mixer) beat the cream cheese, on medium low speed, until smooth. Gradually beat in the sugar. Add the melted chocolate and beat until fully incorporated. Add the eggs, one at a time, beating well (about 30 seconds) after each addition. Scrape down the sides of the bowl as needed. Add the vanilla extract and sour cream and beat until thoroughly incorporated. Remove the crust from the refrigerator and pour in the filling. Place the cheesecake pan on a larger baking pan and place in the oven.

Bake for about 50 - 55 minutes or until firm yet the center of the cheesecake will still look a little wet and wobbly. Remove from oven and carefully run a knife or spatula around the inside edge of pan to loosen the cheesecake (helps prevent the surface from cracking as it cools). Let cool and then cover with plastic wrap and refrigerate for a few hours before covering with the ganache.

Ganache: Place the chopped chocolate in a stainless steel bowl. Heat the cream and butter in a small saucepan over medium heat. Bring just to a boil. Immediately pour the boiling cream over the chocolate and allow to stand for a few minutes. Stir until smooth. Cool slightly and then pour over cheesecake. With an offset spatula or back of a spoon, evenly spread the ganache over the top of the cheesecake. Cover and return to the refrigerator for several hours or overnight. This cheesecake tastes best after being refrigerated for at least a day.

Serves at 12 - 16 people.

for more, visit joy of baking

(Picture above is the only reference since we were too lazy to capture a shot)

Monday, November 30, 2009

Sticky Marshmallow Cornflakes treats, Teriyaki Boneless Chicken

What's more perfect than this for a holidays treat, especially if your intention is to snuggle cosy in front of the TV and catch up on all your missed episodes from drama serials or movies!

Marshmallow Cornflakes (serves32)

for more, visit jamie

125g butter
1 teaspoon vanilla essence
300g marshmallows
2 medium sized packets cornflakes

1. Melt butter in a large pot over medium heat.
2. Add vanilla and marshmallows. Stir continuously until marshmallows have completely melted. (Do not overcook or butter would be charred)
3. Remove from heat, and mix in cornflakes.
4. Press the cornflakes mixture into a pan (or at least a flat low surface pan to ensure that you can cut the marshmallows easily)
5. When cool, cut into squares and serve.


Teriyaki Chicken

0.500kg of boneless chicken thigh meat
Masterfoods Teriyaki Marinade (widely available at any supermarts)
1) Marinade the Chicken overnight.
2) Place chicken on an oven-baked tray. To keep it wet, place aluminium foil over the chicken. Garnish with more marinade before putting into the oven (about 200deg C.). After about 15 minutes, bring out and flip the chicken to the other side. Garnish with marinade before putting back into the oven for another 10 minutes.
3) Serve hot. For 3-4 people.
(Alternatively, you can use chicken broth to marinade sauce at 1:5 ratios when garnishing)


can even add sesame for garnish.

Friday, November 6, 2009

No Bake Oatmeal Peanut Balls

This is a treat for children when school's out. Not that my school's out, its just study break but I guess its about the same. Seeing that this recipe looks really easy (no bake!) and that I have all the ingredients at home, I decided to try for myself.


credits to crepesofwrath.

Ingredients:

2 cups rolled oats
3/4 cup white sugar
3 tablespoons unsweetened cocoa powder
1 tablespoon water
1/2 teaspoon vanilla
1/2 cup butter, softened
4 tablespoons peanut butter
3/4 cup confectioners' (icing/powdered) sugar

Your ingredients

Everything that's needed is inside. (oat at the bottom followed by white sugar, cocoa powder at the bottom right, peanut butter center left, butter top left, water and vanilla essence seeped into the mix)

Use your hands to mix into a dough. (I initially wanted to practice hygiene and used a spoon, but to no avail)

Using your hand is so much easier and more effective.


your brown lump


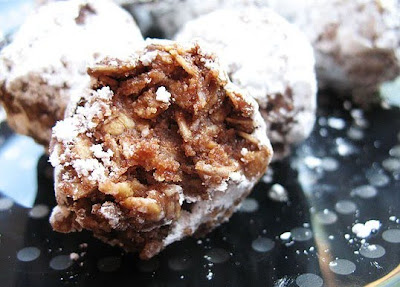
Doesnt this look like meatballs? Haha.


This looks like ondeh-ondeh now

Even when consumed at room temp, it taste great! Best of all, I did everything within 1 hour!

Steps:
1. In a large bowl, combine the oats, sugar and cocoa. With clean hands, mix in the water, vanilla, butter and peanut butter to form a dough.

2. Wash your hands, then roll the dough into balls 1 to 2 inches in diameter.(The size is dependent of personal preference).Sift the powdered sugar before rolling the balls in it until thickly coated. Spam the remaining icing sugar all over the balls.

3. Chill on a baking sheet in the fridge for at least 30 minutes before serving. Makes around 25-30 balls. (I had about 40 balls cause I made mine smaller)

SCHOOL'S OUT AT: taste and tell

Thursday, October 29, 2009

summertime tagliarini


115g/4oz pinenuts
juice and zest of 2 lemons
 a large bunch of fresh flat-leaf parsley, leaves picked, half finely chopped and half left whole
215ml/7½fl oz extra virgin olive oil
150g/5½oz Parmesan cheese, freshly grated, plus extra for shaving
50g/1¾oz pecorino cheese, freshly grated
sea salt and freshly ground black pepper
500g/1lb 2oz good-quality tagliarini or tagliatelle

1) Smash up half of the pinenuts to a paste, then put it into a big heatproof bowl with the rest of the whole pinenuts, the lemon juice and zest, the finely chopped parsley and the extra virgin olive oil.

2) Stir and add the Parmesan and pecorino. What you should have now is a reasonably thick sauce, which you should think of more as a dressing, so taste it and think about how the different flavours are coming through. I want you to balance the flavours so you end up with something quite zingy because, as the sauce heats up and the cheese melts, the flavour of the lemon will calm down a lot. Season with some freshly ground black pepper. Taste it and if you think you haven’t got the balance right, simply add a little more oil and Parmesan.

3) Put a large pot of salted water on to boil for your pasta. Sit the sauce bowl on top of the pan while the water’s heating up – this will take the chill out of the sauce and warm it through slightly. When the water starts to boil, remove the bowl and add your pasta to the water. Cook it according to the packet instructions then drain in a colander, reserving a little of the cooking water.

4) Toss the pasta with the sauce and a little of the reserved cooking water to help loosen it up a bit. The heat from the pasta will melt the cheese, allowing all the lovely sauce to coat it. If you find the sauce is too thick then add a little more water. It’s not supposed to be claggy, thick and miserable, but incredibly silky, fresh and fragrant. Have one last taste to balance the flavours, and serve with a little extra Parmesan shaved over the top and a sprinkle of parsley leaves. Eat immediately.

for more, visit jamie oliver

Chilled Mango Cheesecake

For the woman who deserves nothing lesser than second best :)


Chilled Mango Cheesecake


Ingredients:

Base:

50gm digestive biscuit crumbs
50gm oreo biscuit crumbs (I used digestive biscuit crumbs for everything)
40gm melted butter

Filling:
200gm cream cheese
1 tbsp rum (or almond essence)
1 tbsp lemon juice
55gm sugar
200g mango puree
1 tbsp gelatin
3 tbsp boiling water
200ml whipping cream (whipped)
2 tbsp icing sugar
1 mango (cubed)

Mango puree topping:
100gm mango puree
2 tsp gelatin
3 tbsp boiling water

Method:

1. Toss cake base ingredients into melted butter and press firmly on to base of cake pan. Chill in the fridge for use later.

2. Whip whipping cream with 2 tbsp icing sugar till about 70% stiff or mousse state, keep chilled.

3. Dissolve gelatine powder in 3 tbsp boiling water. Keep warm but not hot for use later.

4. Cream cheese, sugar, lemon juice and rum together till smooth and creamy.

5. Add the warm gelatin solution to mango puree and blend well.

6. Stir mango mixture into cheese mixture and combine till well mixed. Blend in the whipped cream. Stir in the cube mango pieces (optional).


7. Pour cheese mixture onto cake base and chill for at least an hour.

8. Dissolve gelatin powder with 2 tbsp boiling water and stir this into mango puree. Pour topping gently onto chilled cheesecake.


Chill for at least 3 hours before serving.


happy birthday mum :)

credits to do what i like :)

Broccoli Drizzled with Indian-Spiced Yogurt


10 oz broccoli crowns (about 2 small), broken into florets
1 teaspoon extra-virgin olive oil
2/3 tsp each: cumin seeds, fennel seeds
Seeds from 2 cardamom pods
1/3 cup plain low-fat yogurt
Zest and juice of 1/3 lemon
Kosher salt and black pepper


1) In large pot of boiling, salted water, add broccoli. Cook 4 minutes. Drain well.

2) Heat oil in large skillet over medium high. Add broccoli. Cook, stirring, 5 minutes or until lightly charred. Transfer to platter.

3) Meanwhile, in small skillet over medium high, toast cumin, fennel and cardamom until browned and fragrant, 3 to 4 minutes. Grind in spice/coffee grinder or in mortar using pestle.

4) Stir 3/4 of cumin mixture into yogurt along with lemon juice and zest. Season with salt and pepper.

5) Drizzle broccoli with spiced yogurt. Sprinkle with remaining cumin mixture.

Alternatively, visit: cheap healthy good

Friday, October 16, 2009

Olive vegetable with lime fried rice

Another one of jo's inventions :)

Olive vegetable with lime fried rice (Serves 6)

(This was obviously not the picture of the rice I had but is rather more for visual purposes.)


Ingredients:

chopped garlic
chopped onion
3 cups rice
pepper
180g olive vegetable (available at any groceries)
300g minced meat
raisins
pine nuts (I omitted this but was told that this could have given an added flavour to the rice)
chopped spring onion
lettuce (in small streaks) (optional)
lime (optional but highly recommended)

Steps:

1) Prepare the white rice. When it has been cooked, cool the rice and add in some pepper to bring flavours to the rice.

2) In a frying pan, pour out a small dose of the olive oil from the canned vegetable and add more vegetable oil if its not enough. Fry the garlic til it turns golden brown before adding in the onion into the pan. Be sure that it is on low fire.

3) Add the meat into the mixture till its fully cooked, add in the cooked rice and the olives. Add in the raisins, pine nuts and stir until the rice is properly mixed.

(No salt or soy sauce should be needed since the olive would give be salty enough :) )

4) Next, stir in the spring onion. You would be able to smell the fragrance almost immediately, on top of the nice visuals.

5) Before serving, garnish with as much lettuce as you want and squeeze lime juice onto each small portions of rice. It is sure to whet your appetite. Serve hot.

Tuesday, October 6, 2009

Orange Date Muffins & Chocolate Muffins

There's been a muffin craze recently! What better ways to destress than to bake? Looking at the ingredients I had at home, it was an impromptu decision one evening to bake them. Unfortunately, my mum warned me that it's not easy baking quality muffins(moist and soft). I had several friends who tried the muffins said they were a little hard and dry.


Orange Date Muffins:

1 cup (130 grams) all-purpose flour
1 cup (130 grams) whole wheat flour
2/3 cup (140 grams) light brown sugar
2 teaspoons baking powder
1/2 teaspoon baking soda
1/2 teaspoon salt
1/2 teaspoon ground cinnamon
1 tablespoon grated orange zest
1/3 cup (80 ml) fresh orange juice
2/3 cup (160 ml) buttermilk
1 large egg, lightly beaten
1 teaspoon pure vanilla extract
4 tablespoons (57 grams) unsalted butter, melted and cooled

2/3 cup (90 grams) chopped dates
2/3 cup (60 grams) walnuts, coarsely chopped

(I substituted almond grains for the nuts though)
Garnish: (optional)
Granulated white sugar


Steps:

1) Preheat oven to 205 deg C. Place rack in the middle of the oven. Butter well or spray, with a non stick vegetable spray, 12 muffin tins (or line with paper liners).

Ingredients for the day

2) In a large mixing bowl, combine the flours, sugar, baking powder, baking soda, salt, ground cinnamon, and orange zest.

3) In a separate bowl, mix together the orange juice, buttermilk, egg, vanilla extract, and melted and cooled butter.

Wet mixture for the orange date muffins

4) Add the milk and egg mixture to the flour mixture. Stir just until combined. Fold in the dates and walnuts. Do not over mix the batter or the muffins will be tough when baked.

5) Evenly divide the mixture among the 12 muffins cups and sprinkle each muffin with a little sugar, if desired. Place in the oven and bake for about 15 to 20 minutes, or until very lightly browned and a toothpick inserted in the center comes out clean. Place on a wire rack to cool.

Makes 12 regular-sized muffins.


Chocolate Muffins:

1/2 cup (113 grams) unsalted butter, melted and cooled
2 large eggs
1 cup (240 ml) buttermilk

2 teaspoons pure vanilla extract
1 3/4 cups (230 grams) all-purpose flour
2/3 cup (60 grams) unsweetened cocoa powder
1 1/4 cups (265 grams) light brown sugar
1 teaspoon baking powder
1 teaspoon baking soda
1/2 teaspoon salt
1 cup (170 grams) milk or semisweet chocolate chips (I used dark chocolates since I myself am a fan of dark chocolate)
Chocolate Fudge Frosting: (optional)
4 ounces (12 grams) unsweetened chocolate, coarsely chopped
2/3 cup (150 grams) unsalted butter, room temperature
1 1/3 cups (1600 grams) confectioners (powdered or icing) sugar, sifted
1 1/2 teaspoons pure vanilla extract

Steps:

1) Preheat oven to 190 deg C. Position rack in center of oven. Butter, or line with paper liners, 12 muffin tins (or line with paper liners).


2) In a large measuring cup or bowl whisk together the eggs, buttermilk, and vanilla extract.
Wet mixture for the choc muffins

3) In another large bowl whisk together the flour, cocoa powder, sugar, baking powder, baking soda, and salt. Stir in the chocolate chips. With a rubber spatula fold the wet ingredients, along with the melted butter, into the dry ingredients and stir only until the ingredients are combined. Do not over mix the batter or tough muffins will result.

4) Evenly fill the muffin cups with the batter (the muffin cups will be full), using two spoons or an ice cream scoop. Place in the oven and bake until a toothpick inserted in the center of a muffin comes out clean, about 20 minutes. Transfer to a wire rack and let cool for about 5 minutes before removing from pan.

Setting them aside into the muffin tray

5) Chocolate Frosting: Melt the chocolate in a heatproof bowl placed over a saucepan of simmering water. Remove from heat and let cool to room temperature.

6) In the bowl of your electric mixer, or with a hand mixer, beat the butter until smooth and creamy (about 1 minute). Add the sugar and beat until it is light and fluffy (about 2 minutes). Beat in the vanilla extract. Add the chocolate and beat on low speed until incorporated. Increase the speed to medium-high and beat until frosting is smooth and glossy (about 2 -3 minutes). Spread a little frosting on each muffin with a knife or offset spatula.

Makes 12 regular sized muffins.

I didn't actually have buttermilk so I googled on how to prepare it from scratch. It's relatively easy actually. Place a tablespoon of white vinegar or lemon juice in a liquid measuring cup, add enough milk to bring the liquid up to the one-cup line. I added 2 drops of buttermilk essence to the mixture as well but I guess this is optional.


blackiee